Are you interested in decorating your tumbler using epoxy resins but don't know how much epoxy for tumblers you need? Making epoxy tumblers will be interesting and indulging if you are a DIY fanatic. You only need to get the right amount of epoxy resin to get a glitter tumbler.
Before you start making an epoxy tumbler, there are a few factors you need to consider for the project to be successful. Below is a list of the things that are important to put into account when choosing an epoxy resin.
Check the thickness or thinness of the epoxy resin. Generally, the epoxy resin thickness should be about two folds. However, in special specifications, a resin can undergo thinning. Thus it would help if you were cautious to know when to thin your resin for the best epoxy tumblers.
Check to see if the resin is FDA compliant. If you want to use the best quality for your epoxy cup, you should check whether the resin you are using is FDA compliant. The FDA compliance regulations confirm that the resin you are using is safe for interaction with food, water and skin.
Check to see if the resin has UV-resistant properties. Is there a possibility that the epoxy resin discolor will yellow after a long period? Some resins demonstrate resistance to ultraviolet light, thus preventing them from yellowing after a long period. Such resins make the best epoxy resin products for tumblers.
Are you able to work comfortably with an epoxy resin?
Research the resin that other epoxy resin artists use in making epoxy tumblers. If most artists use a specific epoxy resin, it must be great.
Is the epoxy resin heat resistant?- You should go with heat-resistant epoxy resin for tumblers.
Does the epoxy resin have a strong irritable smell?- It can be difficult to work with resins that emit a strong odor; you should choose an epoxy resin that is easier to work with.
After going through this list's specifications, you may end up with the best epoxy resin that meets your criteria and makes the best epoxy resin for your stainless steel tumbler.
If a seller tells you that his resin meets the FDA regulations for food safety, then your glitter tumbler will be safe when in contact with food. However, to be o the safe side, you should leave the top rim of your tumbler free of epoxy resin since you will be sipping from that point.
Setting Up A Work Space To Epoxy Resin
It is important to make early preparations before making an epoxy cup. Start by lining your work surface with a plastic sheet to capture the dripping mess instead of messing up the surface. Next, place the cup turner or a popsicle stick on the surface, then the tape and the plastic lid to offer you stability on the surface. Finally, you can choose a spray adhesive to paint the entire surface of the tumbler if need be.
Use the pointed rod of your spit rod to secure the cup by inserting it into the foam football and then into the tumbler. Next, secure the popsicle stick down the tumbler by pushing the football and the rod down. Next, use a level to check whether the cup is horizontal, then secure the spit rod with a painter's tape t save it from resin drips.
Prepare Your Epoxy Resin

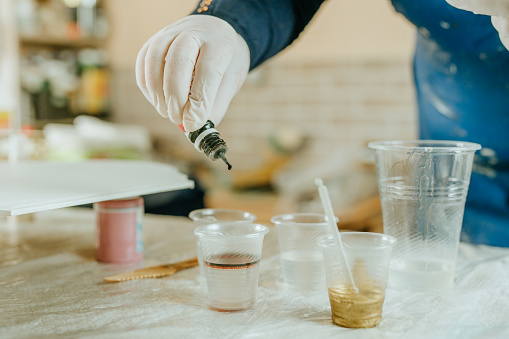
At this stage, you will know how much epoxy you should use in your casting and coating applications. Ensure you have your gloves on before preparing the art resin and follow the label instructions to the maximum. It would be best to be accurate with all your measurements and mixing. You can use a mixing cup and a shot glass for every color tint, divide the resin into cups and mix them thoroughly.
Start mixing with a lesser tint to avoid the possibility of a foggy resin mixture. You should always remember that a little goes a long way when working with resin. In each color you use, you should not put more than 6% of the combined volume of the resin and the hardener. If you put more, there is a chance that the resin may fail to cure.
Resin Application
For this part, you should flip the motor on and while the cup turns, pour your prepared resin on top of the spinning tumbler. Use a popsicle stick to spread the resin evenly and keep repeating the process as you put a different tint. You can let the tumbler cure for 18-24 hours and then proceed t epoxy it with glitter.
How To DIY Glitter Tumbler
Glitter tumblers add a special touch to your end product when you get th procedure right. It is worth noting that before you apply glitter on a tumbler, the base paint should be the same as the glitter you are applying. If you don get the same glitter, you should make it synonymous to some extent to improve its presentation. You can apply acrylic glitter paint using a silicone brush while waiting for the tumbler to dry.
If you end up with loose glitter, you can apply an adhesive on the tumbler surface and sprinkle the glitter generously. Let the tumble dry, then apply a coat of resin.

