

Have you bought a bidet toilet seat and don't know how to install it? Or are you looking to buy a bidet toilet seat to save the cost of buying tissue paper? Whichever the case, this article is tailored for you as we will discuss how to install a bidet on your existing toilet seat.
Before we jump into the article, do you have an idea of what a bidet seat is? If your answer is no, let us clarify what we will talk about so that you can get a clearer understanding of this article.
What Is A Bidet Seat?
A bidet seat is a model that has a heated water supply with an adjustable spray pressure known as a bidet hose and an air dryer. The bidet also comes with an in-built sensor under the seat that allows it to spray when it detects someone sitting on the seat.
A bidet toilet seat is easy to install once you get the procedure. It will only take you 15 minutes plus the right tools in hand. However, before we hop into the main part of this article, which is how to install a bidet, there are a few things that you should always keep in mind.
Most bidet seats connect to a water supply hose that you will find in the package you bought or behind the toilet. They also require electricity to function since electricity plays the main part in heating and spraying the water. If you don't have electricity, you will be unable to air-dry.
Since we are going to deal with an electrical gadget here, it would be best if you had a GFCI-rated outlet in your bathroom with two buttons that indicate "test and reset." The outlets are important since they have an internal circuit breaker that prevents you from getting shocked accidentally. If you don't have one or you are not sure if you have one or not, it is best to call an electrician to come and have a look.
If you have doubts about whether the power cord will reach you, you should know that bidet toilet seats have a length of between 42 inches to under 48 inches. However, if you have bought a shorter, you can still use an extension cord grounded and rated for outdoor use. Go through the model to ensure you are following the specifications correctly. Let us now discuss how to install a bidet toilet seat.
How To Install A Bidet Toilet Seat
1. Remove The Existing Toilet Seat
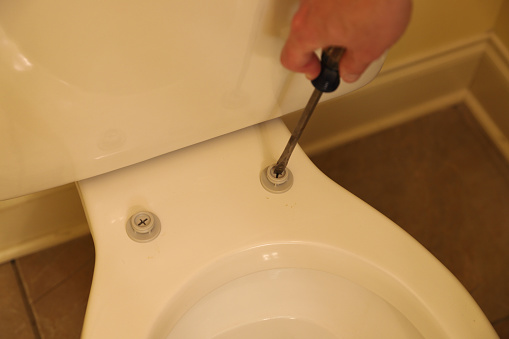
You should attach the bidet to the existing toilet seat using large toilet seat bolts. Th bolts may have small plastic covers on top of them that you will have to pop out using a flathead screwdriver.
If you can access the top of the bolts, you can use a screwdriver to remove them. Reach underneath the toilet and twist the bolts' nuts into place. In most cases, you will find that the mounting bolts are a part of the toilet sure to unscrew. In such a case, you should look for a pair of nuts underneath the rim of the toilet seat. Untwist the bolts and free the seat.
Once you have removed the nuts and bolts from the mounting holes, lift the old toilet seat, and it should come off easily. Before installing the bidet, clean the rim to prepare it for the new bidet seat. Some bidet toilet seats may use the old toilet seat, so it would be best not to throw it away.
2. Install The Mounting Bracket
Use the hardware that comes with the bidet seat to screw the mounting bracket to the hols of the old seat. Gently slide the bidet seat to the bracket as you check if it aligns with the rim of the toilet. To ensure that the set fits perfectly onto the old one, wiggle it a bit as you move it back and forth while pressing. Confirm that everything is lined up and take off the seat.
3. Turn Off The Water Supply Of Your Toilet
Look behind your toilet to locate the toilet shut-off valve; you should be able to notice it since it is close to the floor. You will see a water supply hose running from the bottom of your toilet tank to a water supply pipe on the wall.
An oval-shaped toilet shut-off valve connects the water supply pipe. Twist the toilet shut-off valve in an anti-clockwise direction until it stops. Next, flush the toilet to drain the excess water from the water tank.
4. Install the T-Valve To The Existing Water Supply Line
Your new bidet seat comes with a water supply valve known as the T-valve. Th T-valve is T-shaped to divert water between the toilet and the bidet supply hose. Most components in this package are made of plastic, thus making the tightening process quite easy. You can use your bare hands or, with the help of a flat head screwdriver on any metal fittings that you are having trouble tightening up.
Unscrew the supply hose that is at the bottom of the toilet tank. While doing this, the amount of water left in the toilet tank will leak out, so you need to have a bucket or a towel to block it. However, it should not be a cause of concern.
Attach the T-valve beneath the toilet tank where you removed the supply hose. Then, reattach the supply hose to the bottom of the T-valve.
5. Mounting The Bidet Toilet Seat To The Toilet
On your bidet package, you will see a flat plastic mounting plate, take the mounting plate and position it on the back of the rim of the toilet. Ensure you align it with the existing bolt holes. Some bidet toilet seats have the whole bidet attachment as a mounting plate.
Insert the mounting bolts into the bolt holes and secure them tightly using a flat head screwdriver. It should be well-secured and in place when you tighten the nuts underneath the rim. The bolts you have will depend on the bidet seat brand; some are plastic while others are metal. If yours are plastic, then hand tightening will be enough, but you will need to tighten using a wrench or a flat head screwdriver if they are metal.
After tightening, slide the bidet seat on the mounting plate towards the back of the toilet bowl until it aligns into place.
6. Connecting The Bidet Seat To Water Supply
You are installing a bidet seat to cut on toilet paper, so you must ensure that the water supply is efficient. Your bidet seat should have its water supply hose. Take the hose and attach its end to the remaining opening of the T-valve. Attach the other part of the bidet hose to the connection on the side of the bidet seat.
Double-check that all the plumbing requirements are correct. For instance, you should see that the hose is fixed tightly. You can then open the shut-off valve you had turned off earlier by twisting it in a clockwise direction.
It will fill up the toilet tank and supply enough water to function your bidet. Test if the bidet seat has some leaks and tightens the water hose if you have to. Check the valve and the connection to the seat and the tank; if there are still leaks, you can tighten them further.
Once you have sealed all the leaks, turn on the water slowly and wait for some minutes for the clean water to fill the bidet seat water reservoir and the toilet tank.
If your bidet seat is electronic, you should ensure that you have plugged it into an electrical outlet known as the GFCI outlet. The GFCI is designed to prevent you from electrical shock and is a common bathroom fixture. If you don't have an electrical outlet within your reach, you can use a grounded extension cord recommended by the owner's manual. Electric bidet seats remove warm water when installed correctly.
For your bidet toilet seat to work efficiently, ensure that the installation is on a great toilet. A great toilet means that the toilet flushes with force, works quietly, and you can easily clean it.